Working with Projects
Projects are how you organize and share work within alwaysAI; this section describes how to create and work with Projects in detail. Project assets include the models your application uses, devices your application can be deployed on, and collaborators who have acccess to Project files. You can create and manage your Projects from the terminal, using the alwaysAI CLI, as well as from your Dashboard.
Creating a New Project
You can create a Project from the Dashboard as well as from your terminal. At a minimum, Projects consist of an app.py file, an alwaysai.app.json file, which specifies the models your project uses, and an alwaysai.project.json, which specifies the Project; if these files are not provided by you, the tooling will provide you with an option to create stubs for these files, which you can then modify. For instructions on creating a Project on the Dashboard, read on. If you instead want to create your Project from the terminal, skip down to the Configuring Your Project section.
Creating a Project From the Dashboard
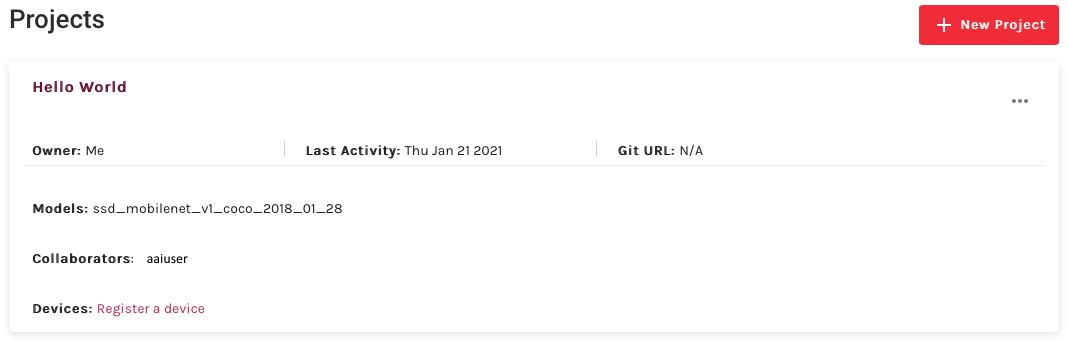
To create a new Project from the Dashboard, log into alwaysAI and go to your Dashboard. Click on the Projects tab, and then select the button that says ‘+ New Project’.
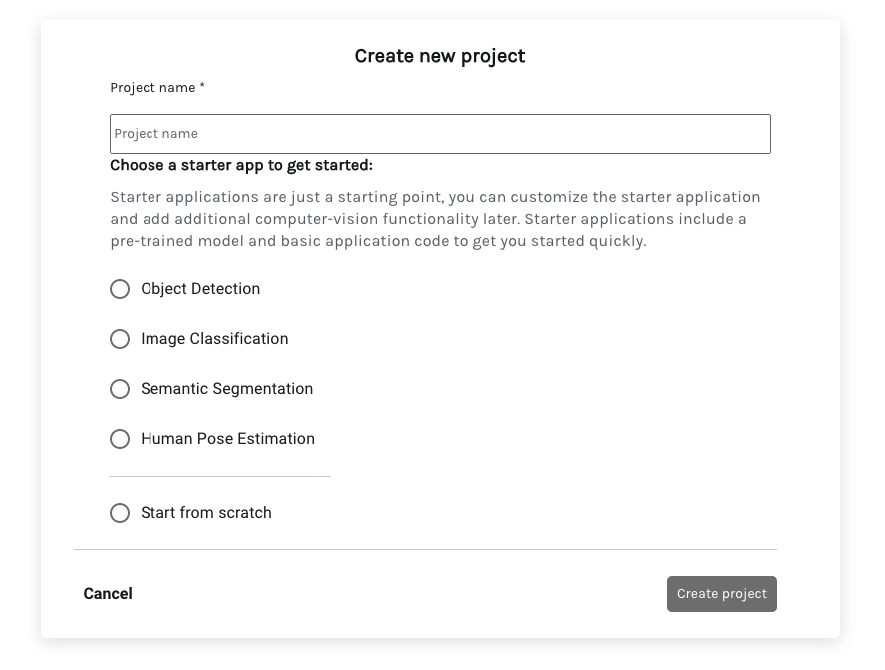
You have the option to create a Project from a five different templates: Object Detection, Image Classification, Semantic Segmentation, or Human Pose Estimation or to create an empty Project and add assets later, by selecting the Start from scratch option. If you select any of the templates that is not from scratch, the Project files will come pre-populated with content and you can simply run the application. Otherwise, if you choose to create a Project from scratch, you will be given the option to create stub files for any missing components.
Once you’ve selected your template, give your Project a name and click Create Project to finish creating your new Project.
Configuring Your Project
Configuring your Project checks for the presence of the required files and enables you to specify where you would like to run the application. The core command to configure a Project is aai app configure.
To create a new Project from the terminal or configure a Project you’ve just created on the Dashboard, first navigate into your local application directory using:
$ cd <project_directory>
Where <project_directory> is whatever you would like your application folder to be named.
If you don’t have a local directory, first create a new directory, and then change to that new folder:
$ mkdir <project_directory> && cd <project_directory>
Then, from within <project_directory>, run the command:
$ aai app configure
If you did create a Project on the Dashboard, you can also simply use the --project <project_id> flag in with the specific Project ID provided on your Dashboard. This will bypass the option to search for the Project name and will automatically associate your Project with the Project on your Dashboard.
$ aai app configure --project <project_id>

You can follow the same process to configure an existing alwaysAI application directory as a working Project. Just run the aai app configure command from within any chosen directory, pick a Project name or make create one, and it will be ready to go. You can also run this command to change the location you want to run the application, and set up a new edge device for your applications to run.
Running Your Application
Install the Application
You can run your application locally on your computer, or remotely on an edge device. Where your application runs is determined by how you configured your Project. Once your Project has been configured, you can download necessary model files and Python dependencies. To do this, run
$ aai app install
This command prompts you for your alwaysAI account credentials and then installs the application’s models and a Python virtual environment (venv) into the application directory. This virtual environment contains the alwaysAI API, edgeIQ, as well as OpenCV’s library, cv2. If you have selected to run your application on an edge device, the models folder and venv folder will be built on the specified device, otherwise they will appear in your local Project directory. Read more about application dependencies here, and about working with models here.
Start the Application
Once your Project has been configured and requirements have been installed, you start your application with the command:
$ aai app start
The log output from app.py is forwarded through the CLI to your terminal, including the labels that the model has been trained to recognize.
Once the app starts, a log will be printed with the link:
[INFO] Streamer started at http://localhost:5000
Open this URL in a browser to see the video and text data generated by the app. To stop the application, simply hit CTRL-C or click the red “stop” button on the web page.

Adding Models to Your Project
You can add models to a Project from either the website or using the CLI. From the web, you can add a model to your Project from the alwaysAI Model Catalog or using your own private models in your Dashboard.
Public Models
On the web, simply go to the alwaysAI Model Catalog, and select a model. Within the model details will be a card with instructions on using the model; select your Project from the drop down at the bottom of this card. That’s it! The next time you run aai app configure in the corresponding Project directory, it will detect this change and pull down the model file. You can also always sync changes made from the web Dashboard to your local files by running the command aai app models sync.
Note the text you can copy to update the model used in your app.py file.

You’ll also note a CLI command you can use to add this model from the terminal.
Private Models
Any private models you’ve uploaded to your account (or are being used in a Project that you are collaborating on) will be listed in your Dashboard under My Models.

You can add a private model to a Project much like you are able to add public models. Click through to the model’s detail page by clicking on the model name. From here, you can select your Project from the drop down (similar to adding a public model).
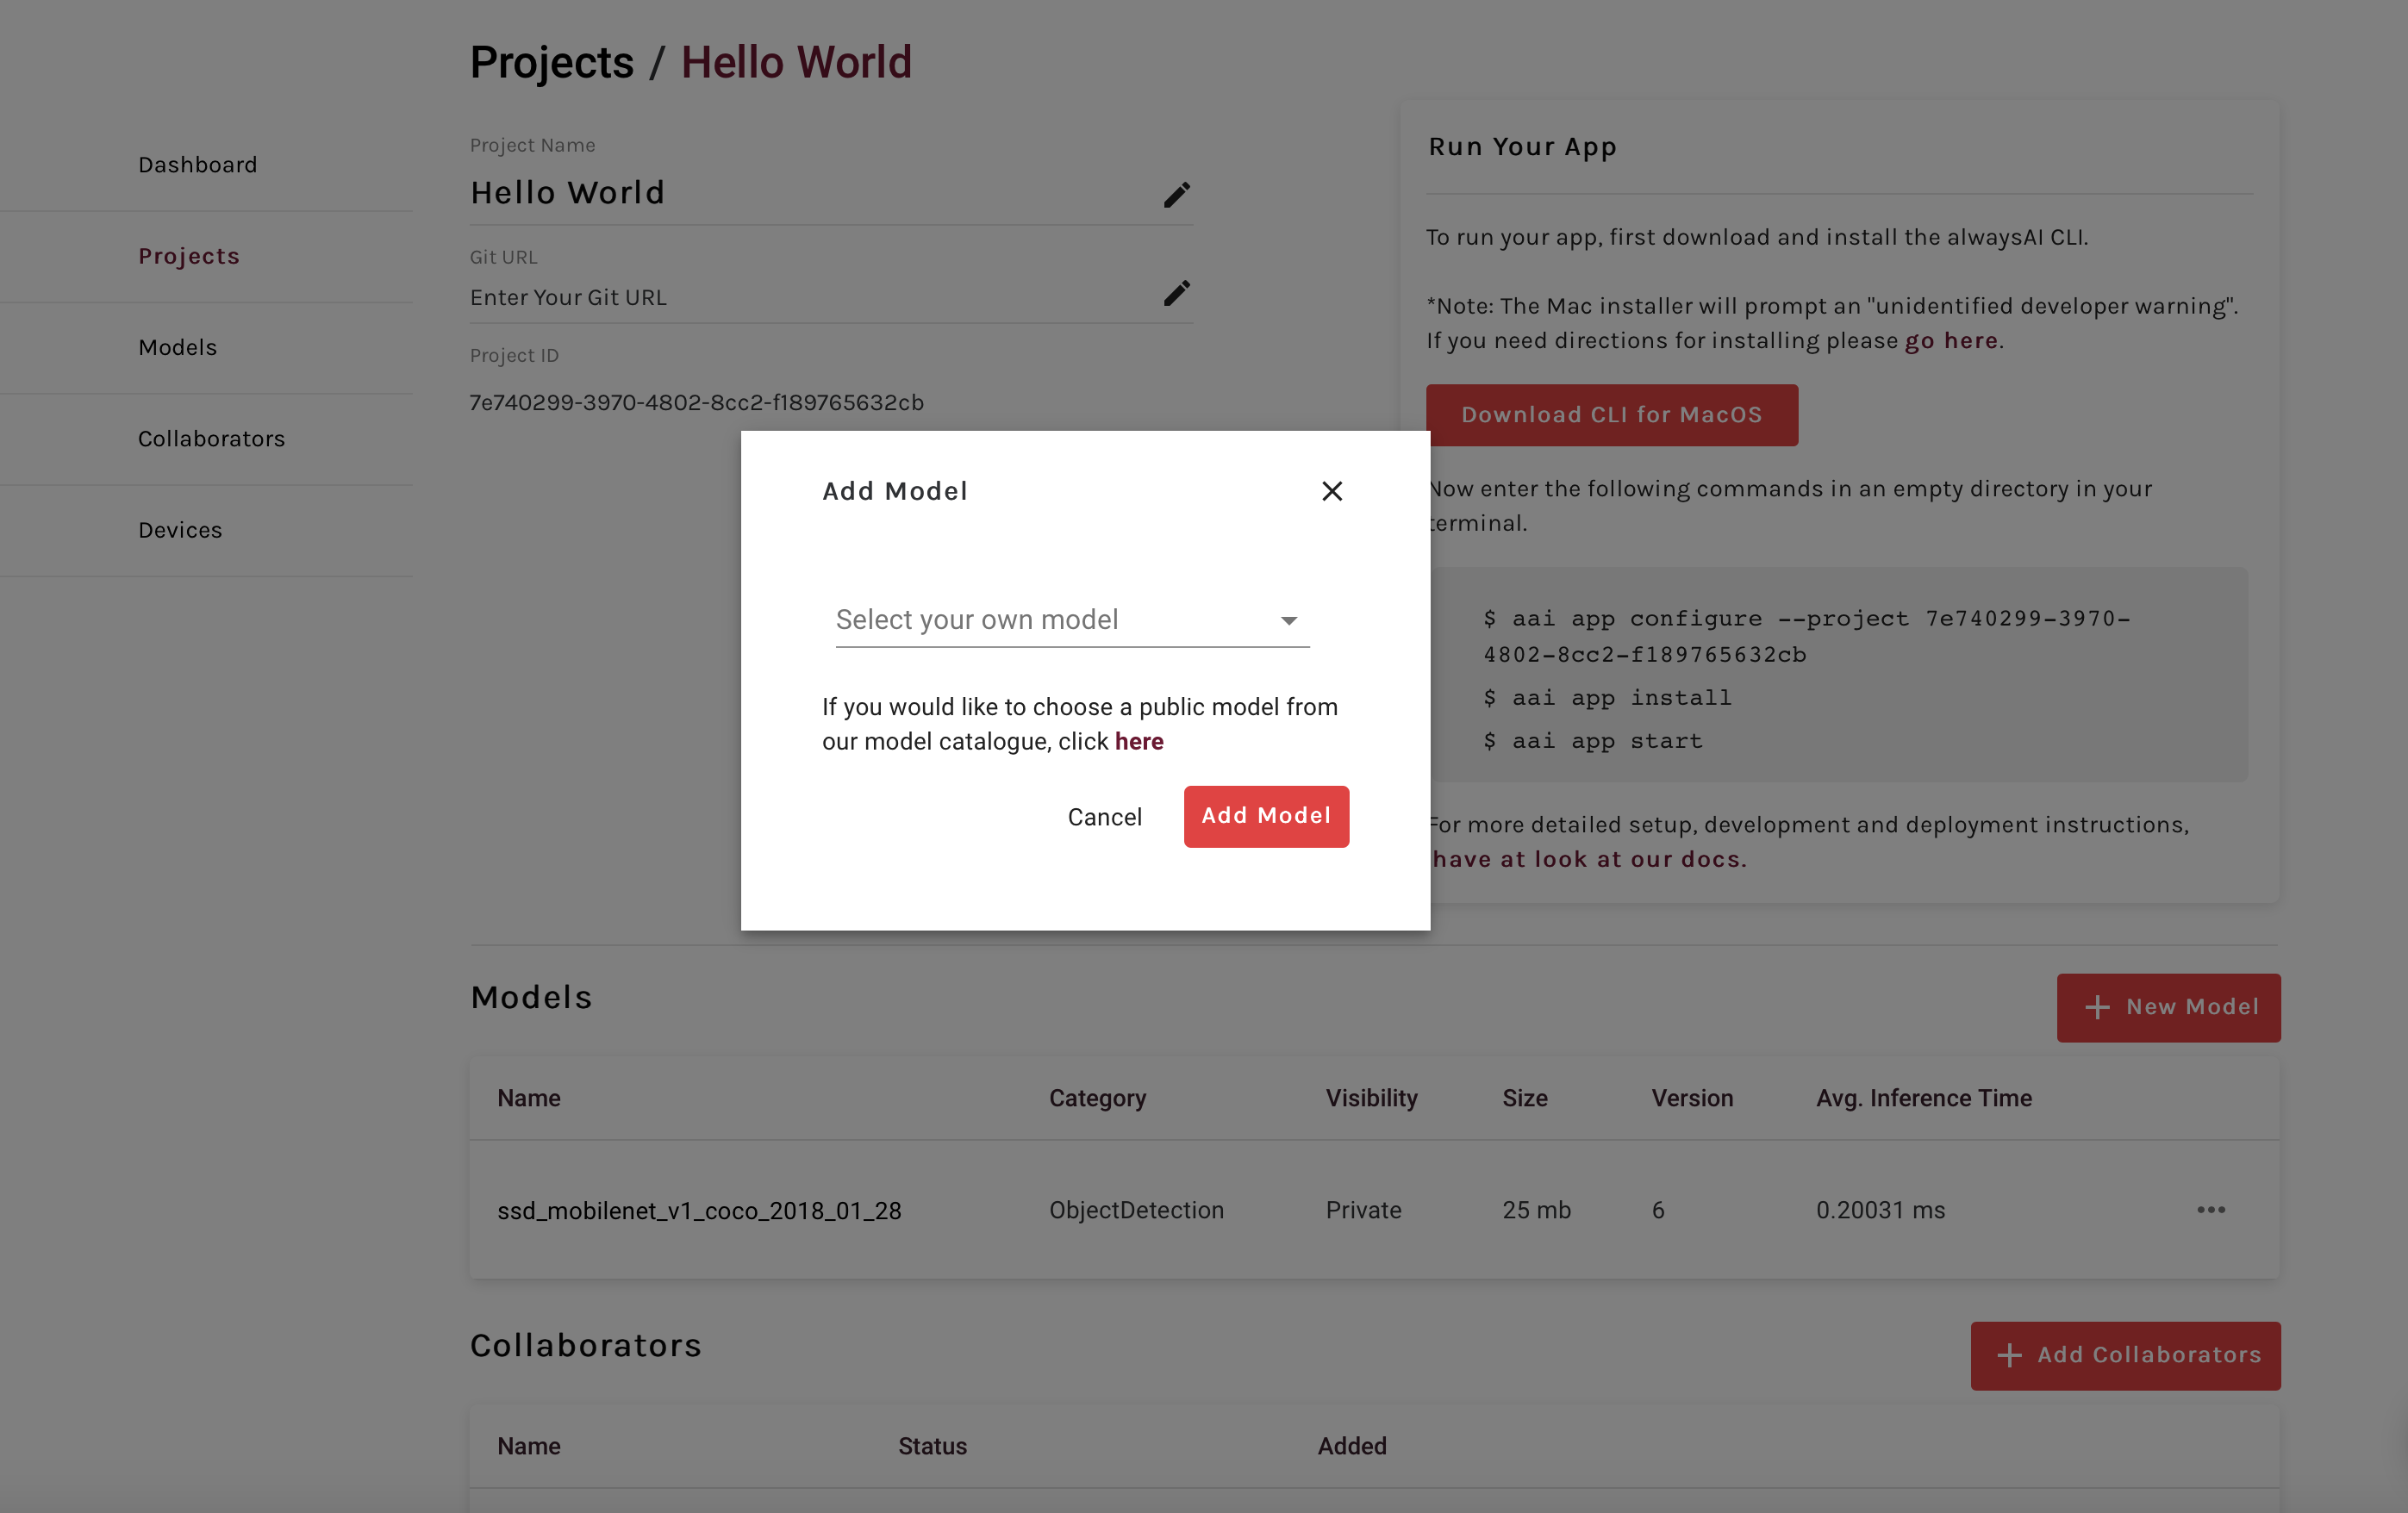
From an individual Project page, you can add models by clicking the red + New Model button to the right of the model section on your Project’s detail page, then selecting the model you’d like to add to your Project from the drop down. Note there is also a link out to the public model catalog provided in this pop-up.
See here for additional detail on adding a model to your Project.
Adding Collaborators to Your Project
Only the people specifically added to a Project, i.e. Collaborators, can use it. This ensures that only you determine who can use your private models and devices that run the application.
To add Collaborators to a Project you own, find the Collaborators card on the Project detail page and select the red ‘+ Add Collaborators’ button. You’ll need to know the email address of the Collaborator you invite; if they do not have an alwaysAI account already we’ll send them an email to sign up and add them to your Project automatically.

Add Devices to a Project
You can add a device to your Project by opening a command prompt, changing to your Project directory if need be:
$ cd /path/to/app
and then executing the command:
$ aai app configure
From here, follow the prompts to configure your Project, including where to install your Project, either ‘Your local computer’ or ‘Remote device’.
If you select ‘Remote device’, you’ll be further prompted to either add a new device or select from the devices available to you.