Managing Production Deployments
Once you have have your project ready to go, your models are trained and added, and you have your target device, you are ready to deploy and manage your application. The alwaysAI console allows you to deploy one application to many devices at one, manage models and configurations remotely after deployment, and control your applications.
Deploying Your Application
This guide describes how to deploy an application to your device. The preferred method is using the alwaysAI Dashboard, but if you want manual CLI instructions please see Deploy Application.
Publish Your Application
First, you must publish your application to the alwaysAI cloud. Optionally you can add a name to your application. To do this, use these commands from the root of your application directory (where the alwaysai.app.json file is) on your development host:
$ aai app configure
$ aai app publish --name <name>
The output of the final command will give you the release hash that was
published. You can run aai release list --project <project_id> to list all
release versions for the project, where project ID can be found in the
alwaysai.project.json file. The application release will now show up on the
project page of the alwaysAI Dashboard as well!
Now you can deploy to your device from the alwaysAI Dashboard.
Deploy Application (Dashboard)
Applications are deployed to devices by deploying a project. This packages the models associated with the project, the selected application version, and all the dependencies required to run the app on the selected devices. The application and models can then be managed for each device.
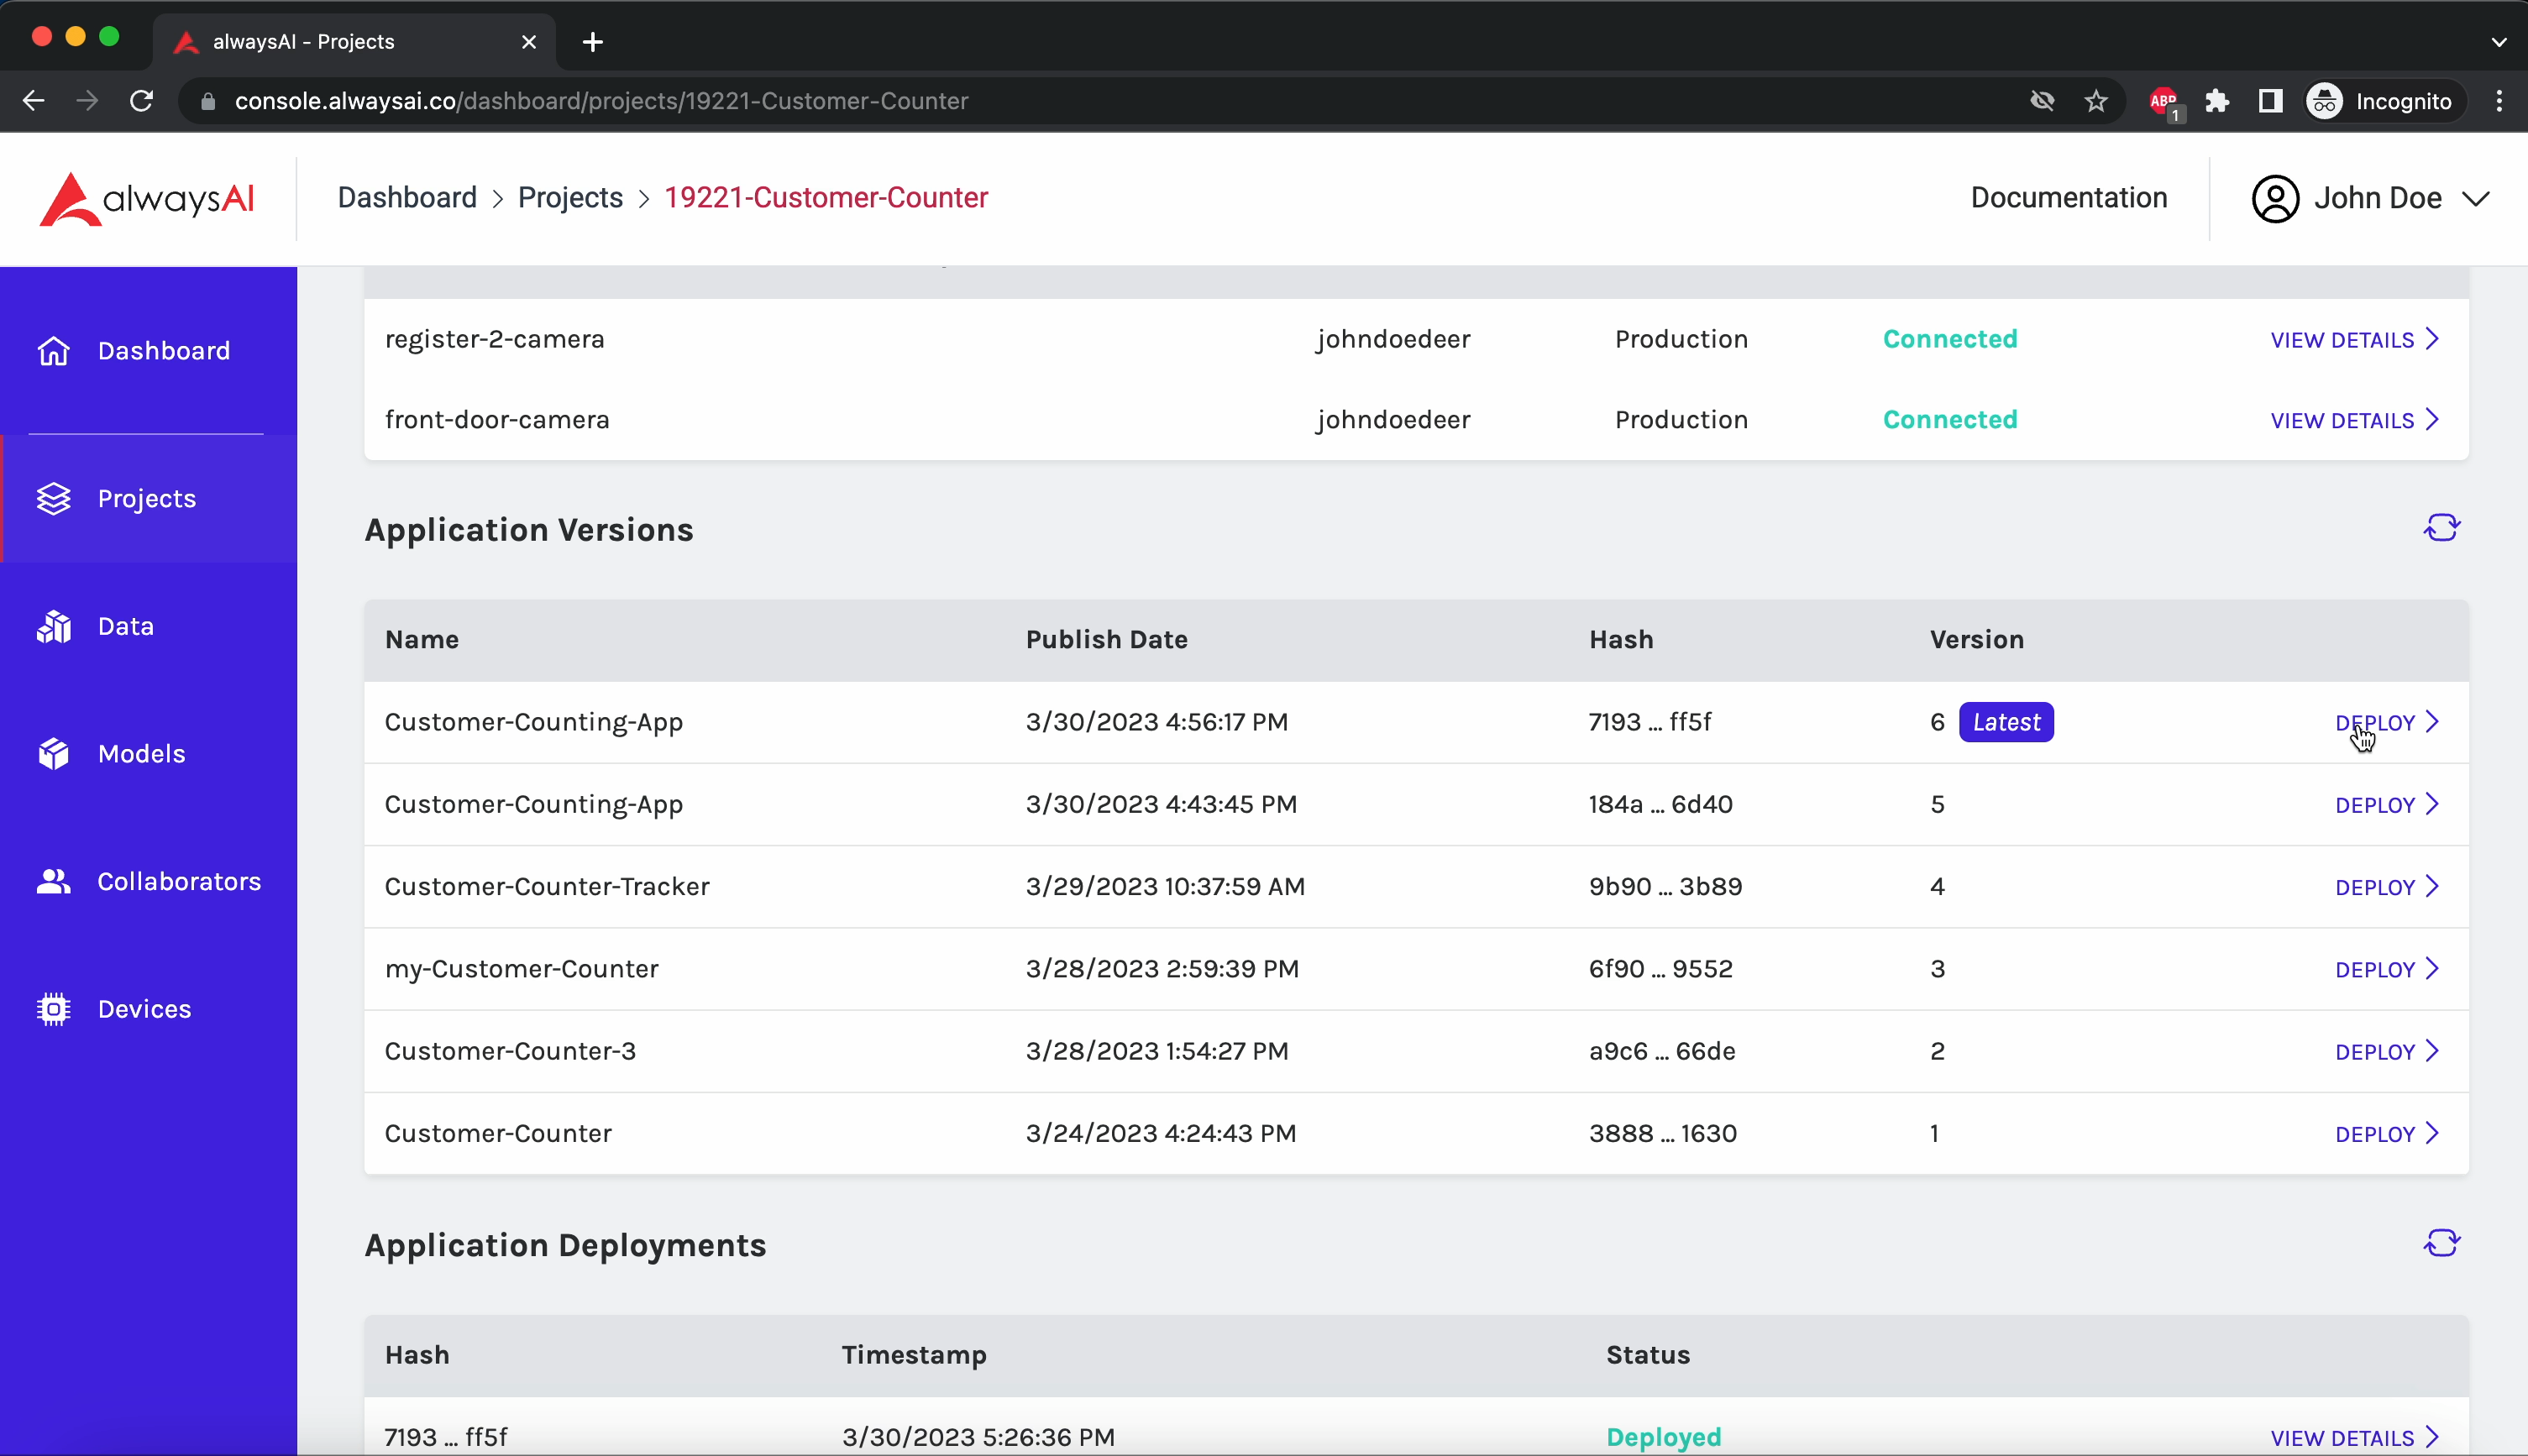
Select Version to Deploy
Navigate into a project on your alwaysAI Dashboard. Scroll to your Applications Versions table to view a list of available application versions. The most recently published application will have the Latest tag next to the version number. Click the Deploy button on the row of the application version you want deploy. This will bring up the Deployment Window.
Deployment Window
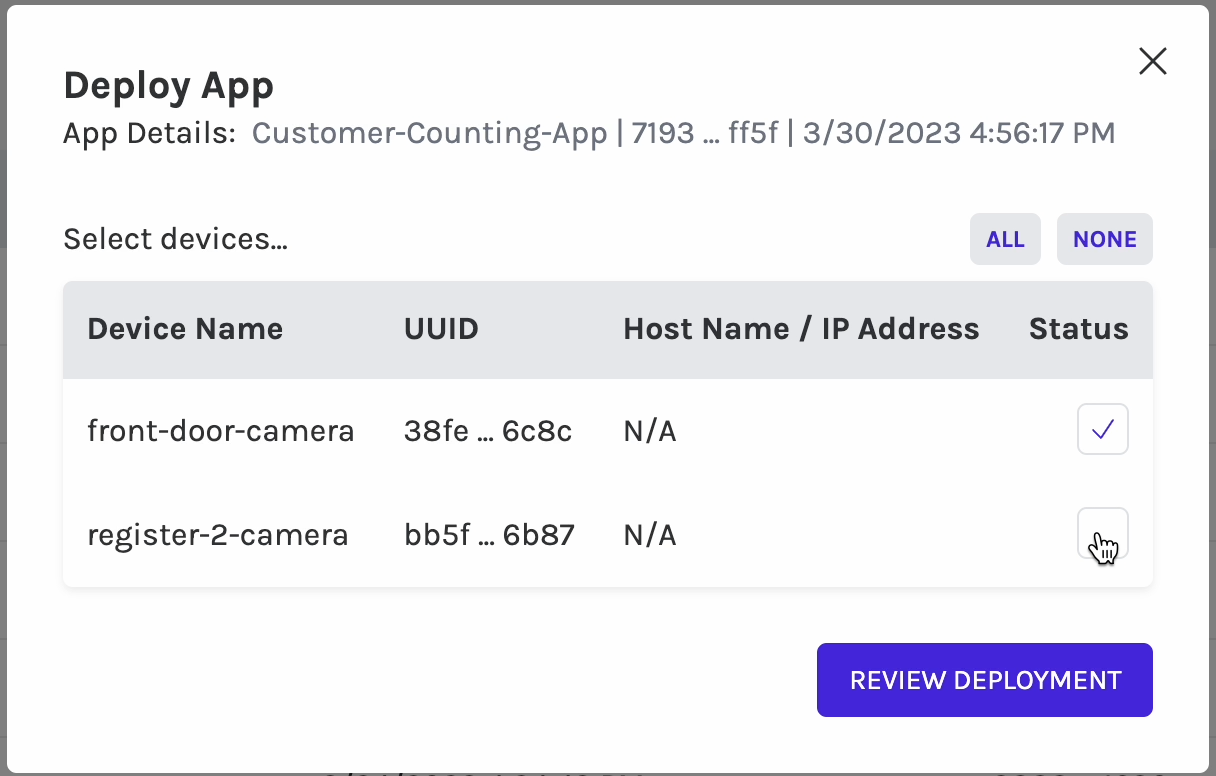
The deployment window is where you configure, confirm, and deploy your application to one or multiple devices. Details about the selected application can be found at the top of the window including:
App name
Application hash
Time and date the application was published
Below you will find a list of your devices. Any device that has been provisioned to your account will be visible. Select any number of devices and press Review Deployment to see a summary of the deployment, then press Deploy Application to start the deployment process. You can follow the deployment process as it is going through the steps needed to put your application on your device(s). The length of time this will take varies depending on internet connections, devices specifications etc.
Review Deployment
Once your application has been deployed, you can review the deployment from the Application Deployments table within your project. There is an overall status communicated on each deployment row, and you can view details by clicking the Details button. This will show you status on a device by device basis, and give you other additional information.

Manage Deployment
The Devices table on the Project Page provides a list of all devices on which your project is deployed. Click the Open button on the right side of one of the devices to view details about the device and the deployment.
Device Details
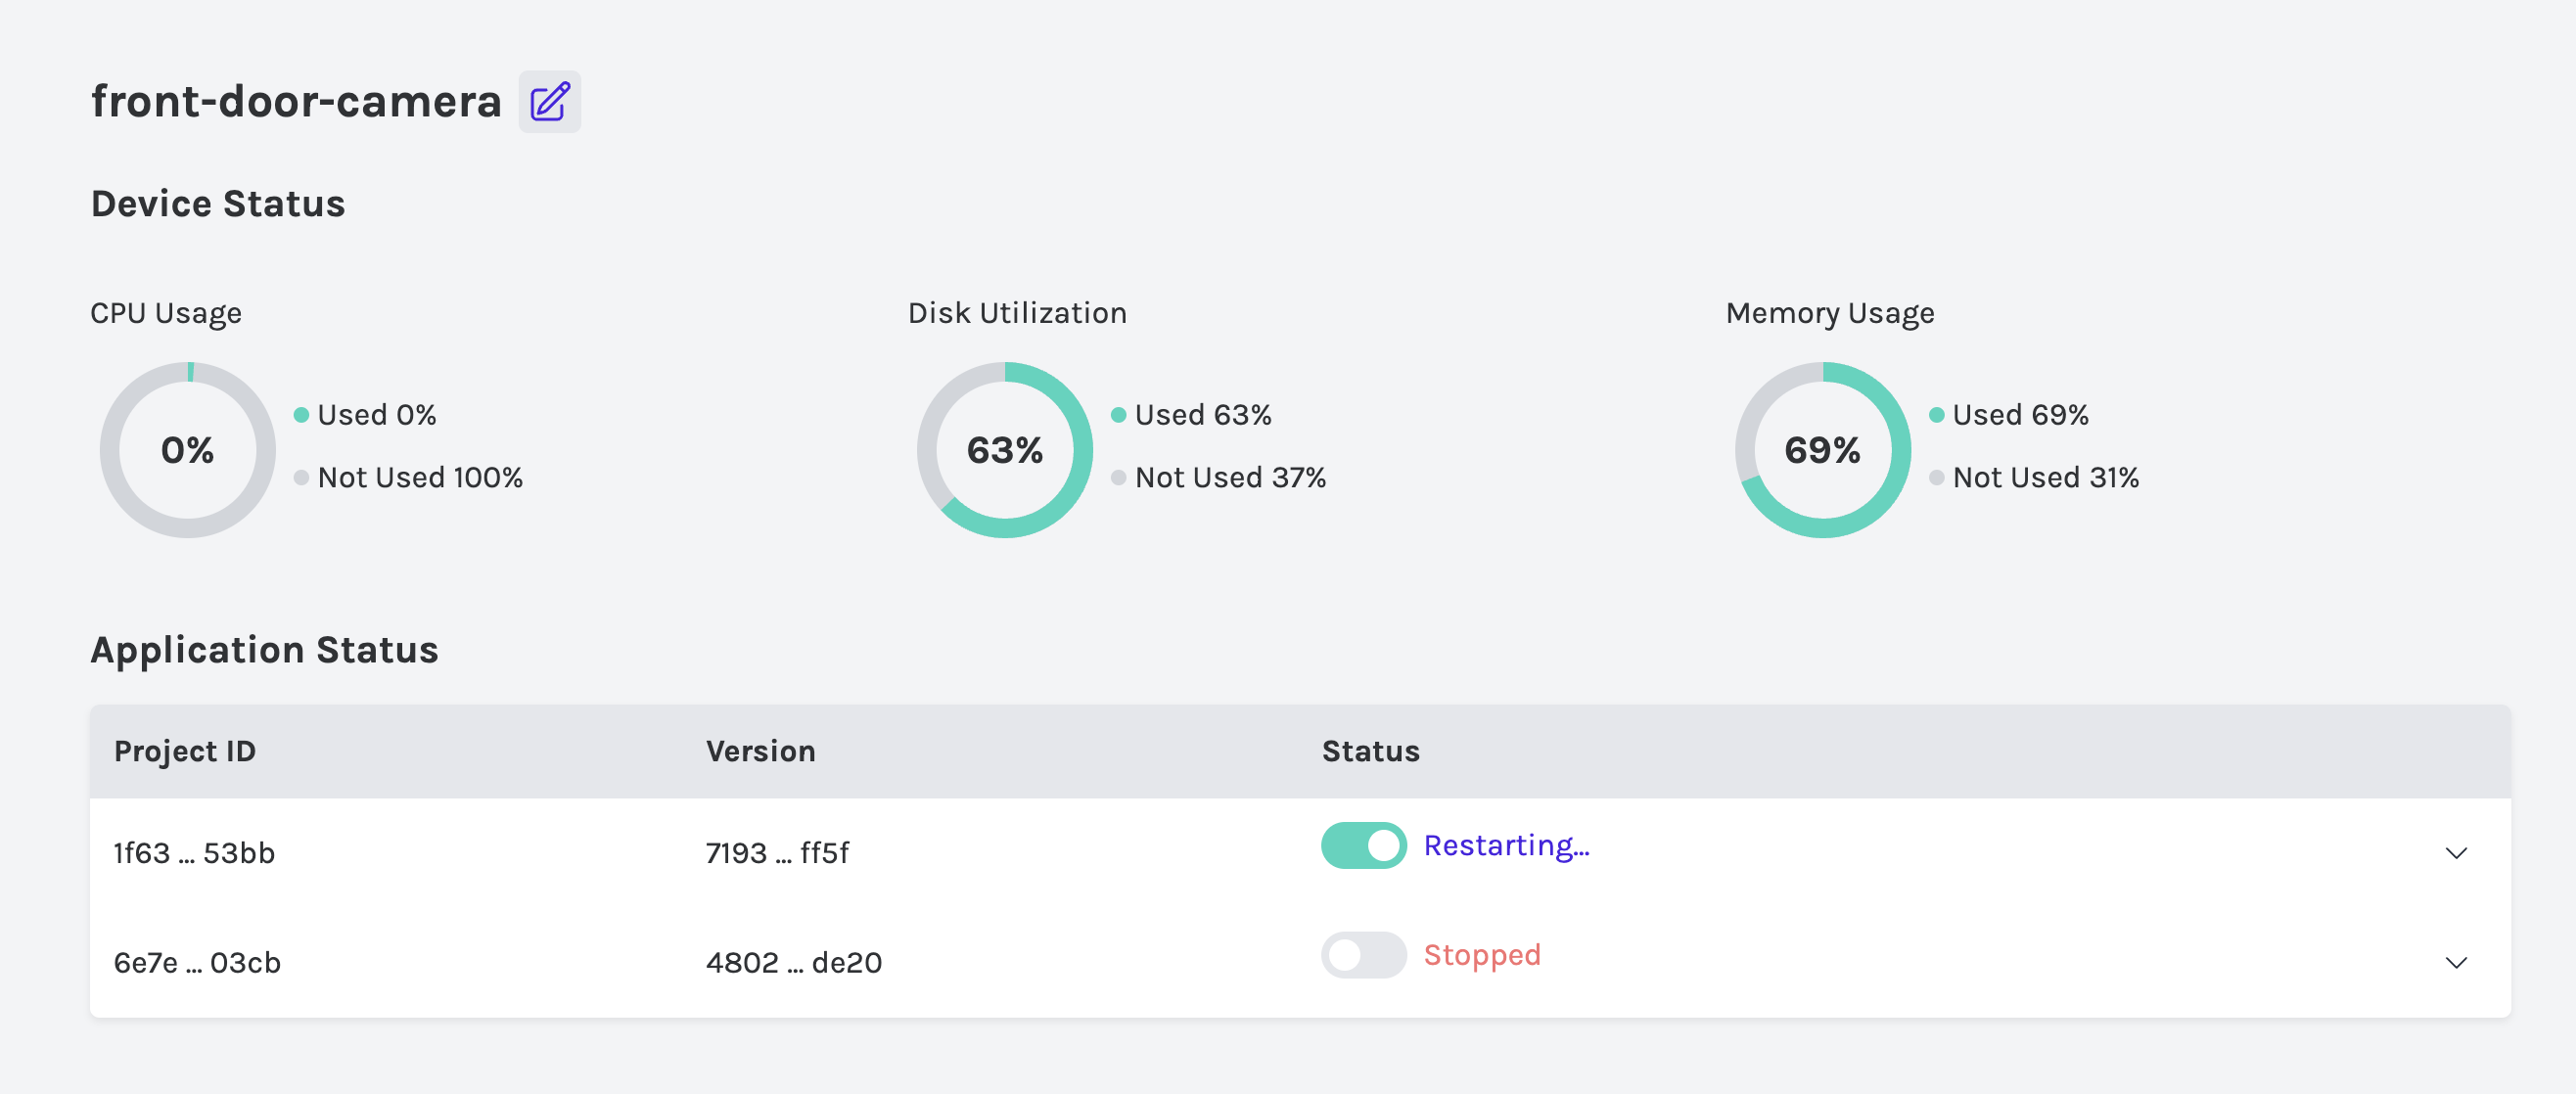
The Device Details page gives you more insight into your device. You can change the friendly name of your device by clicking the edit button next to the device name
Device Status
The Device Status section is where you can see performance metrics for your device. The charts allow you to monitor your device for any operational issues. The real-time metrics displayed are:
CPU Usage
Disk Utilization
Memory Usage.
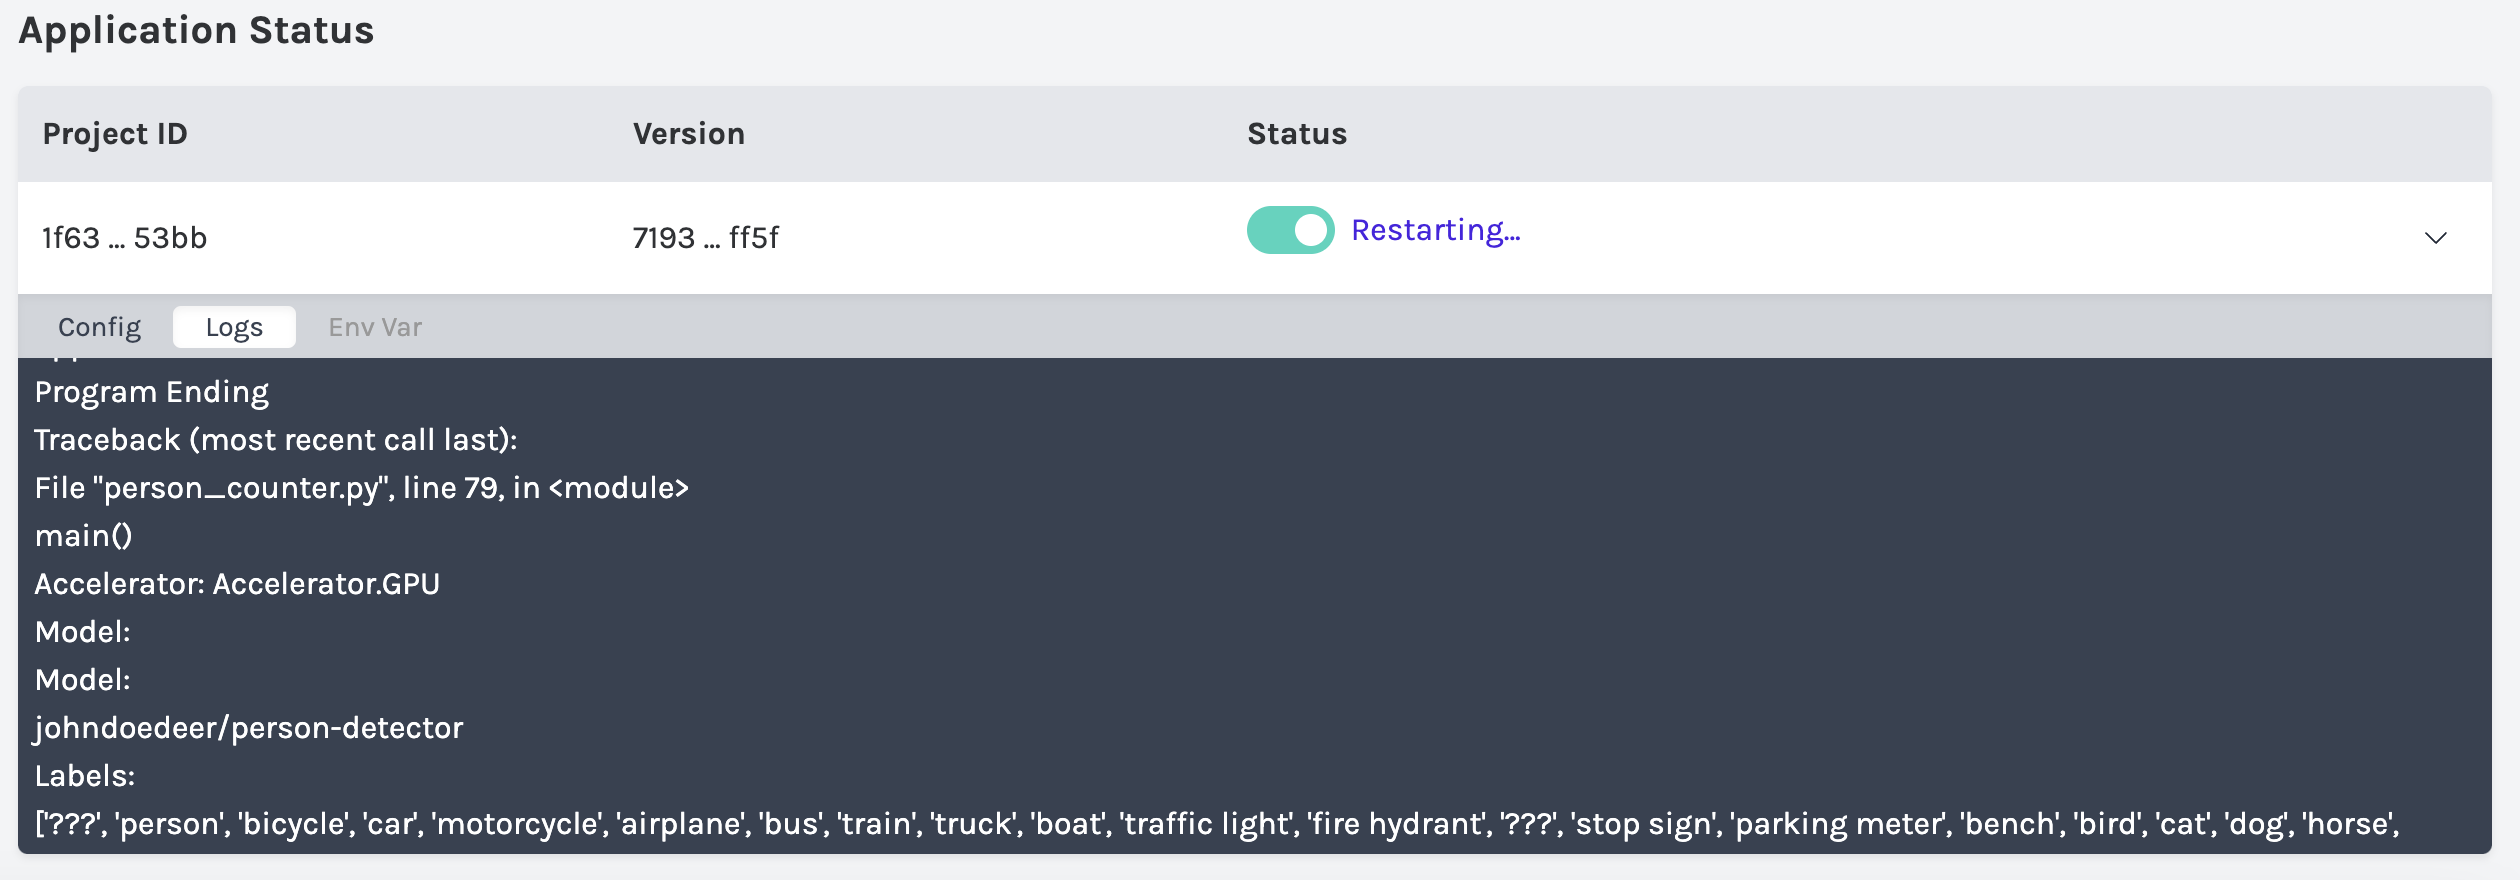
Application Status
The Application Status section displays a table of currently installed applications. Applications can be stopped and restarted using the switch found on each table row. Project ID is the project that is associated with the application and Version is the specific release. Click the down arrow on each row to reveal Configuration and Logs.
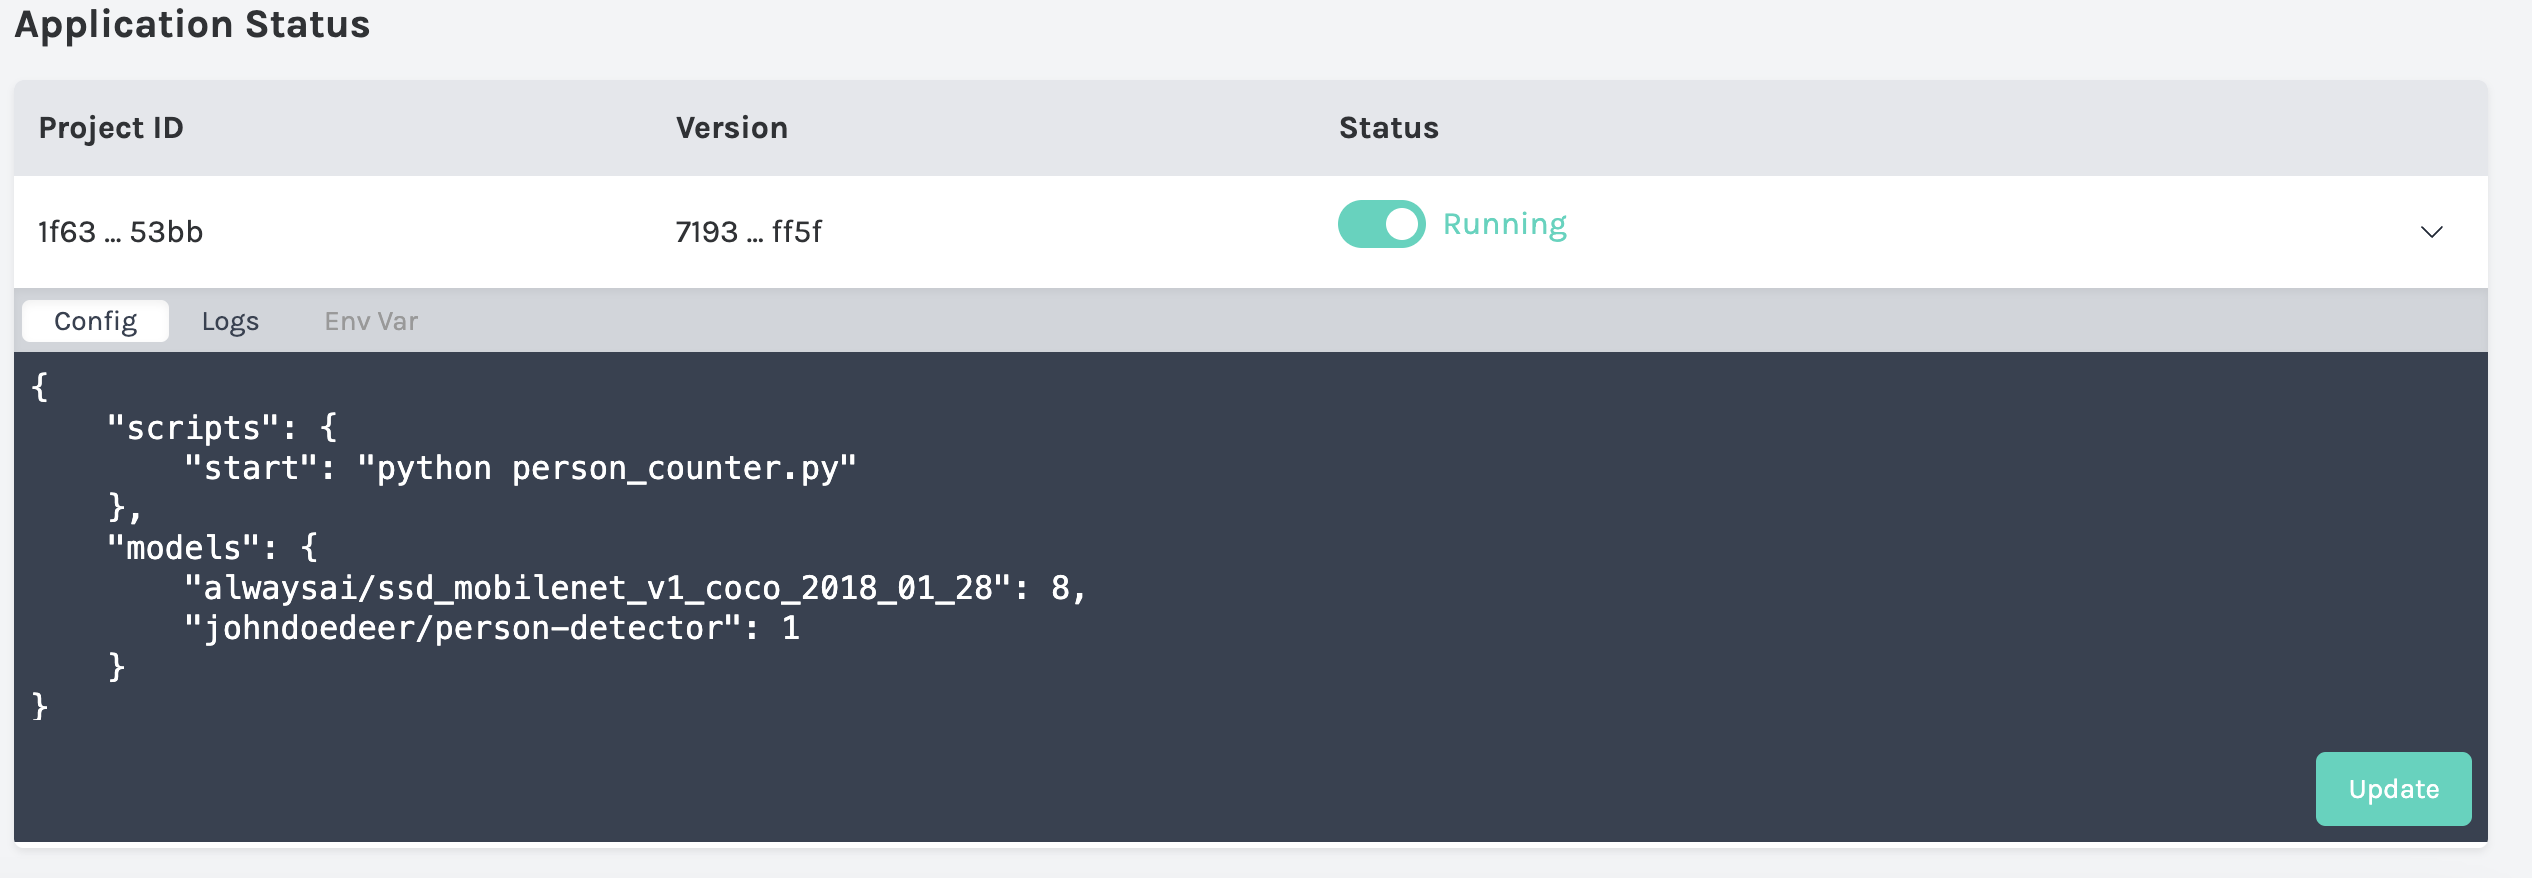
Configuration
The Configuration Tab displays the configuration file for the currently installed application. You can update this file to change the file that runs at application start. You can also add or remove models from this interface. This file is flexible and you can incorporate different settings in your application logic.
Logs
The Logs tab displays the current device logs in real-time. These can be used for troubleshooting or to get a more detailed status.
Other Deployment Information
Now you know how to deploy and manage your application. Consider adding an analytics stream to provide real-time insights to your organization, or customizing your application per location or device. To learn how to add and connect to an analytics stream, view the Analytics Page. For more detailed application configurations and packaging, please see Application Configuration