Deploying Your Application
This guide describes how to deploy an application to your device. The preferred method is using the alwaysAI Dashboard, but we have included manual CLI instructions as well. Once you have deployed your application you can manage it and your device as described on the Device Overview page. If you want to add analytics and other configurations to your device please see the Analytics Page.
Publish Your Application
First, you must publish your application to the alwaysAI cloud. Optionally you can add a name to your application. To do this, use these commands from the root of your application directory (where the alwaysai.app.json file is) on your development host:
$ aai app configure
$ aai app publish
The output of the final command will give you the release hash that was
published. You can run aai release list --project <project_id> to list all
release versions for the project, where project ID can be found in the
alwaysai.project.json file. The application release will now show up on the
project page of the alwaysAI Dashboard as well!
Now you can deploy to your device from the alwaysAI Dashboard.
Deploy Application (Dashboard)
Applications are deployed to devices by deploying a project. This packages the models associated with the project, the selected application version, and all the dependencies required to run the app on the selected devices. The application and models can then be managed for each device.
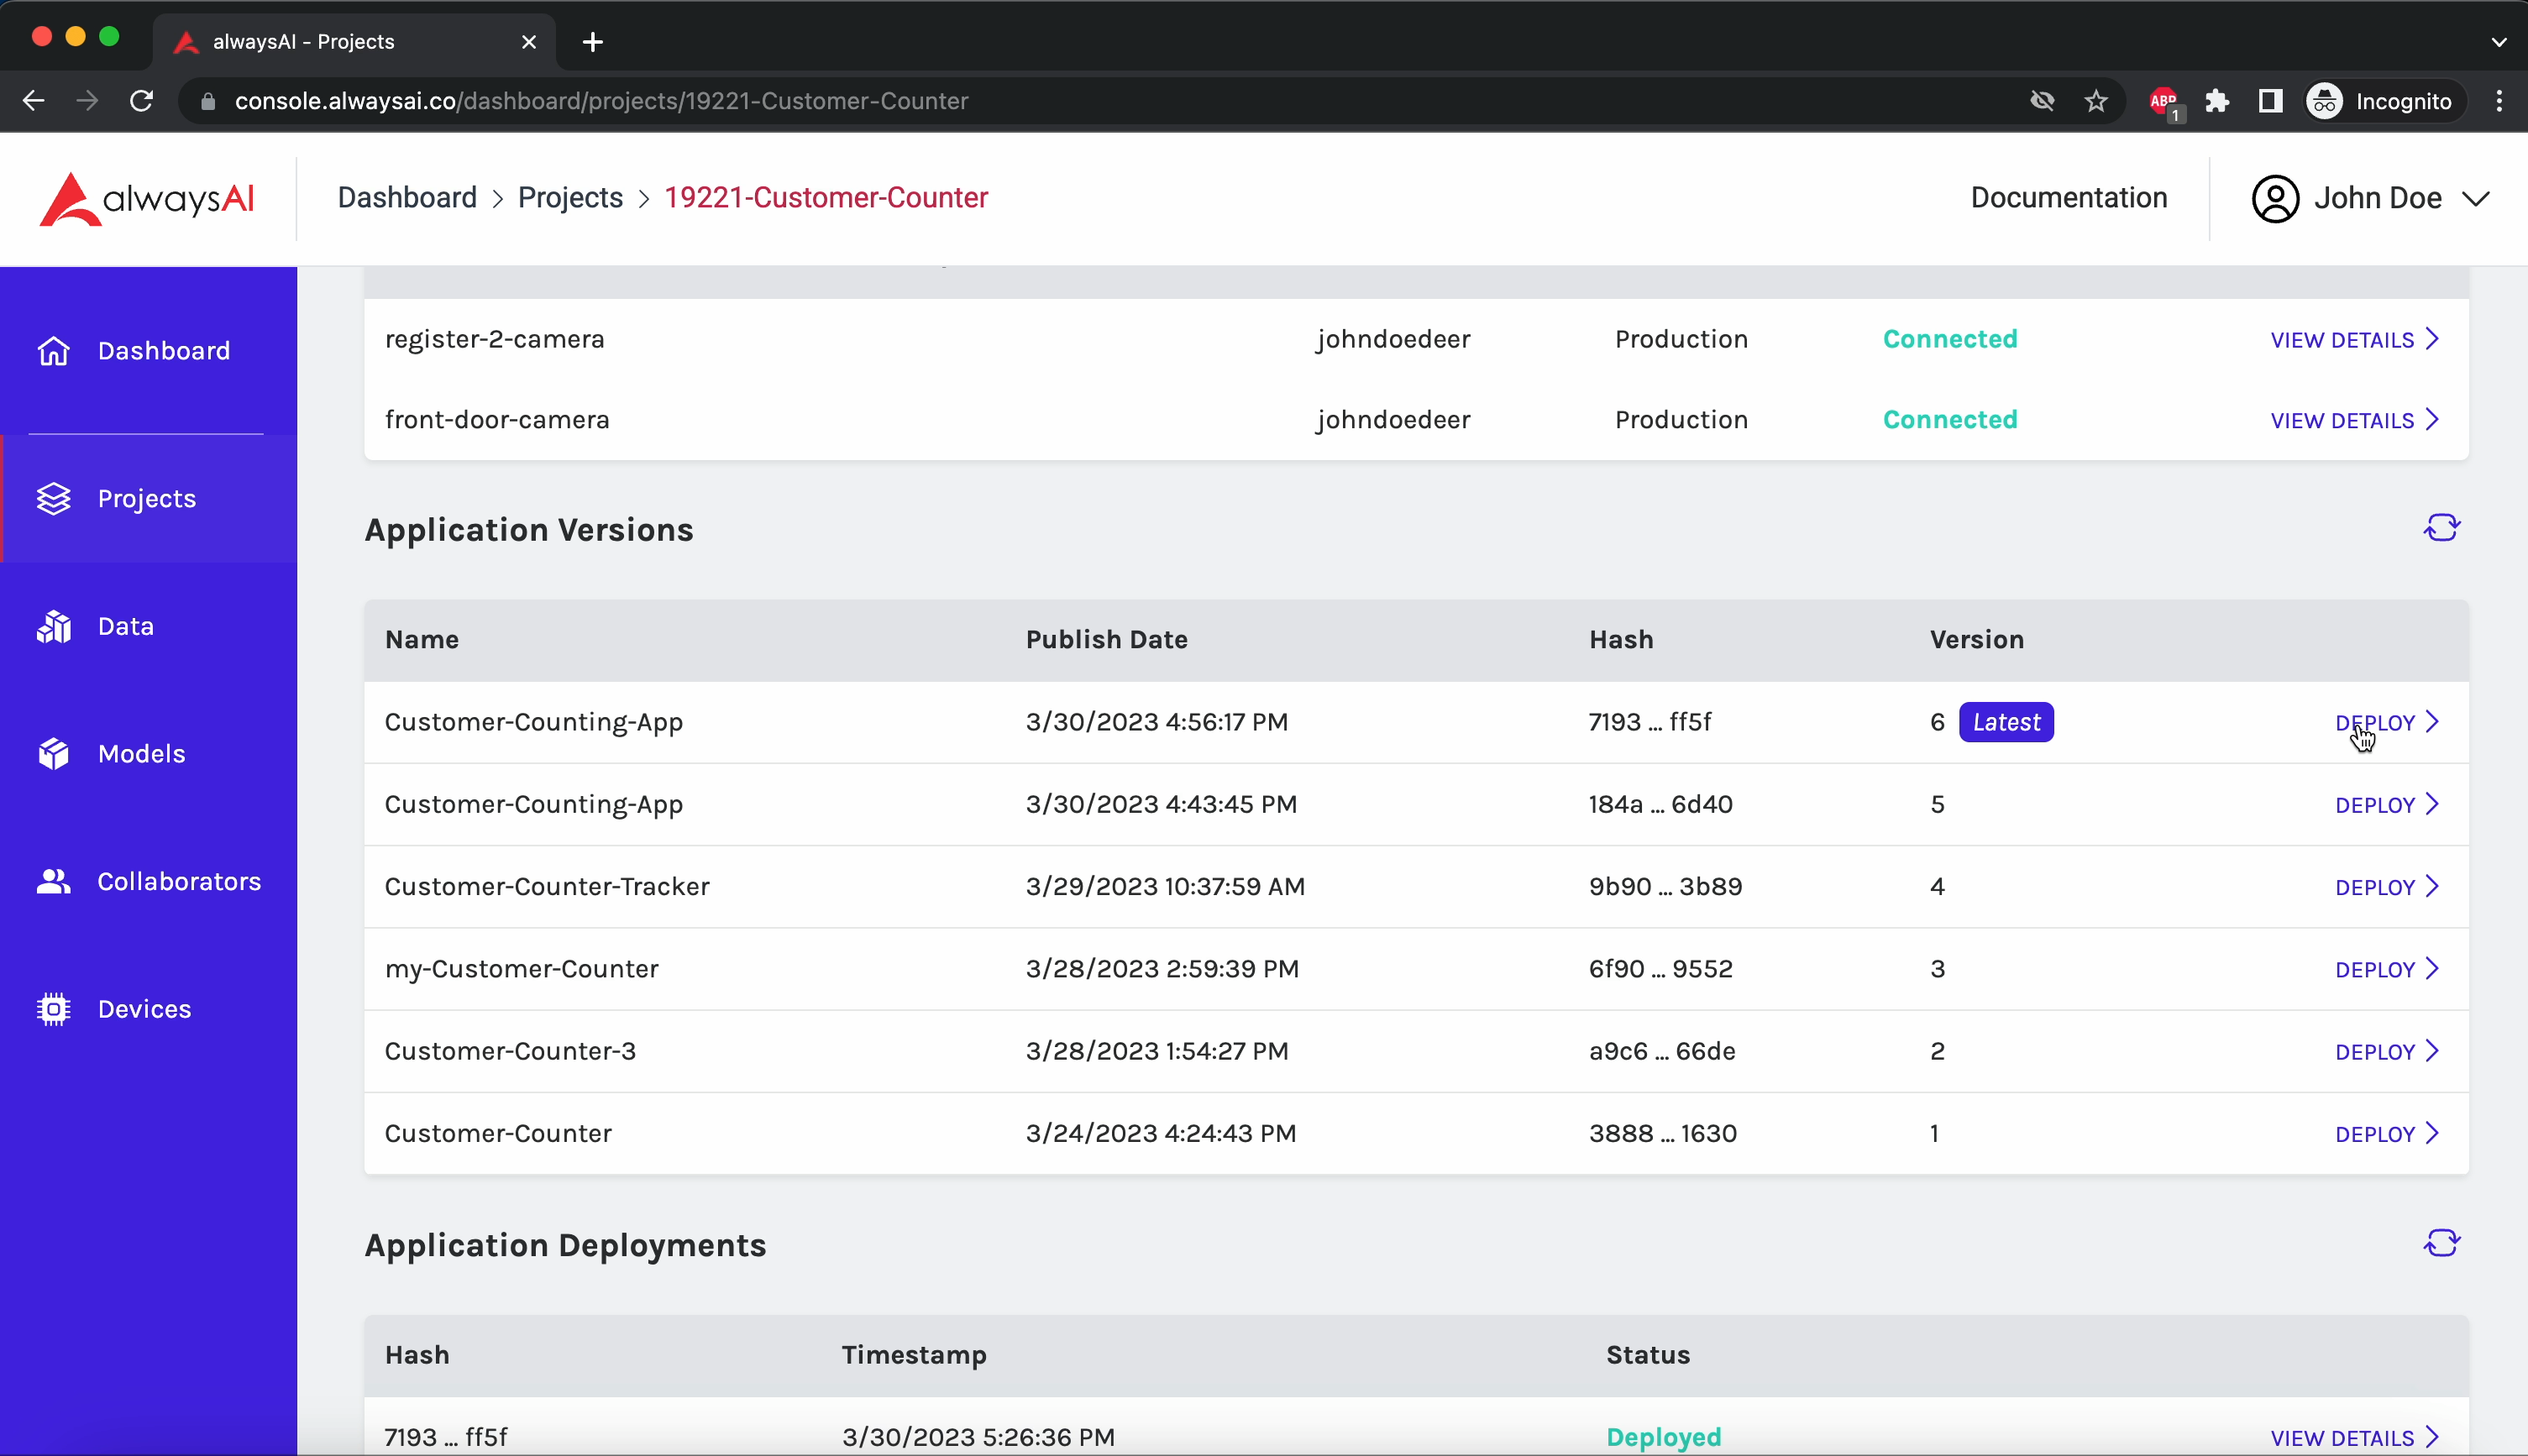
Select Version to Deploy
Navigate into a project on your alwaysAI Dashboard. Scroll to your Applications Versions table to view a list of available application versions. The most recently published application will have the Latest tag next to the version number. Click the Deploy button on the row of the application version you want deploy. This will bring up the Deployment Window.
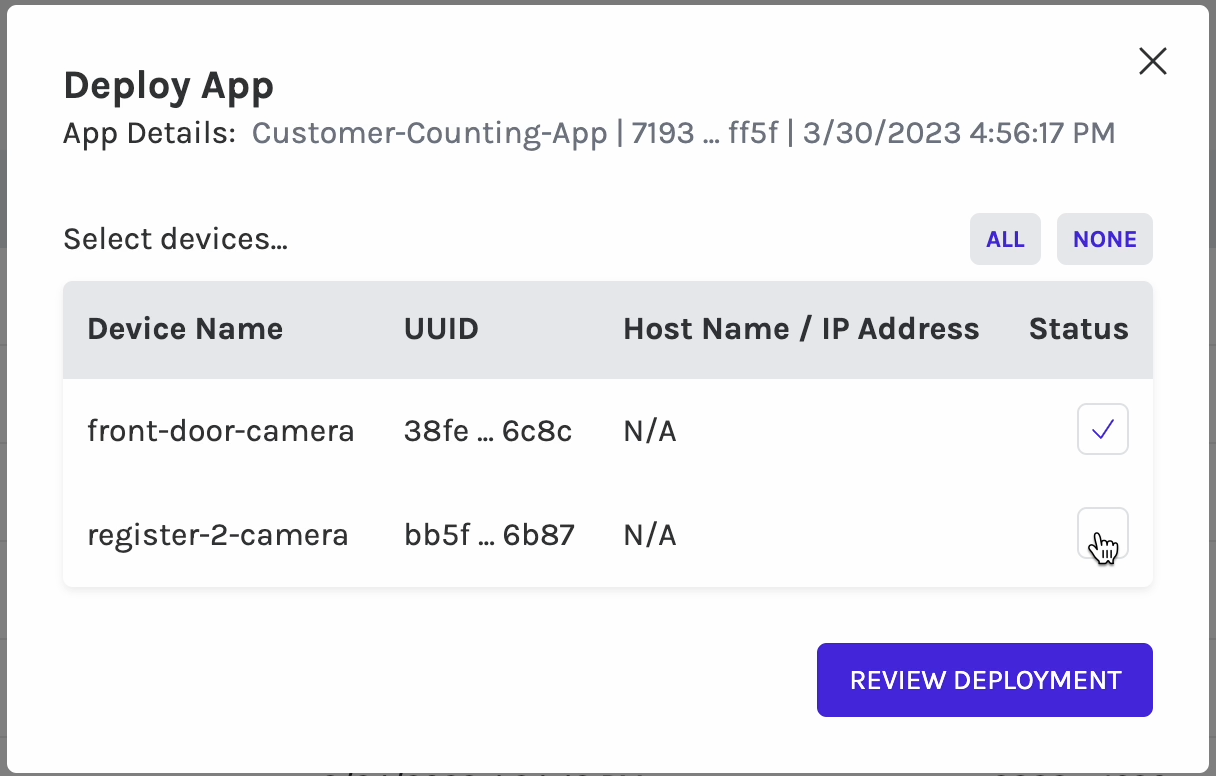
Deployment Window
The deployment window is where you configure, confirm, and deploy your application to one or multiple devices. Details about the selected application can be found at the top of the window including:
App name
Application hash
Time and date the application was published
Below you will find a list of your devices. Any device that has been provisioned to your account will be visible. Select any number of devices and press Review Deployment to see a summary of the deployment, then press Deploy Application to start the deployment process. You can follow the deployment process as it is going through the steps needed to put your application on your device(s). The length of time this will take varies depending on internet connections, devices specifications etc.
Review Deployment
Once your application has been deployed, you can review the deployment from the Application Deployments table within your project. There is an overall status communicated on each deployment row, and you can view details by clicking the Details button. This will show you status on a device by device basis, and give you other additional information.

Deployment Management and Analytics
Details about how to manage your application once it is deployed can be found on the Device Overview Page. To learn how to add and connect to an analytics stream, view the Analytics Page. For more detailed application configurations, please see Application Configuration, or any section of the Application Development pages.
The alwaysAI Device Agent Command Line Interface
Once provisioned, you can interact with your device through the console, but it is not required. If you prefer using the CLI and have ssh access to your device, you can perform all the same actions.
Once you have ssh’d into your device, you can interact with the Device Agent directly using the command line interface.
$ aai-agent --help
Usage: aai-agent <subcommand> ...

   Manage your alwaysAI production device

Subcommands:

   login                 : Login to alwaysAI (this is meant for scripted environments)
   app list              : List all installed apps
   app install           : Install an alwaysAI app from a project
   app status            : Get the status of an installed alwaysAI app
   app start             : Start an installed alwaysAI app
   app stop              : Stop a running alwaysAI app
   app restart           : Restart running alwaysAI app
   app logs              : Get logs for an application
   app uninstall         : Remove an alwaysAI app
   app show-models       : Show the application models
   app add-model         : Add a model to an alwaysAI app
   app remove-model      : Remove a model from an alwaysAI app
   app get-all-envs      : Get environment variables for an application
   app set-env           : Set environment variables for a service
   app get-analytics-cfg : Get analytics configuration for an application
   app set-analytics-cfg : Set analytics configuration for an application. Note that this resets the config so all desired options must be set
   app get-shadow        : Get the current shadow
   app update-shadow     : Update the shadow with the current application configuration
   device init           : Initialize device
   device get-info       : Get device info
   device clean          : Remove all provisioning files
   device restart        : Restart the device
   get-model-package     : Download and unpack a model package
Deploy Application (CLI)
You can install the application on the device using the command line interface of the device agent. Run the following on the device where the Device Agent is installed:
$ aai-agent app install --project <project_id> --release <release_hash>
Control the Application (CLI)
Run the following commands on the device where the Device Agent is installed:
Get application status:
$ aai-agent app status --project <project_id>
Start the application:
$ aai-agent app start --project <project_id>
Show the application logs:
$ aai-agent app logs --project <project_id>
Stop the application:
$ aai-agent app stop --project <project_id>
Uninstall the application:
$ aai-agent app uninstall --project <project_id>
Manage application models (CLI)
There are several ways to manage the models for your application.
Update models to new version of the same model ID
If a new version of a model is published for an existing model ID, and an application is already configured to be using that model ID, updating to the new model can simply be done with:
$ aai-agent app stop --project <project_id>
$ aai-agent app update-models --project <project_id>
$ aai-agent app start --project <project_id>
Replace models for an application for new ID
If you’d like to install an entirely new model to an application, replacing the model the app was originally configured with, run the following command:
$ aai-agent app stop --project <project_id>
$ aai-agent app replace-models --project <project_id> --models <model_id_1> [<model_id_2> ...]
$ aai-agent app start --project <project_id>
If you plan on using this method, you can make your application source model ID agnostic by providing the model ID to edgeIQ in the following way:
Select the first model in the config list:
obj_detect = edgeiq.ObjectDetection(edgeiq._globals.MODEL_ID_LIST[0])
Manually download a model package
To download a model package from the alwaysAI cloud and unpack to a specific directory, run:
$ aai-agent get-model-package <model ID> [--path <destination path>]
For example, to download alwaysai/yolo_v3 to ~/alwaysai run:
$ aai-agent get-model-package alwaysai/yolo_v3 --path ~/alwaysai
Once the command completes, you’ll see the model package in the
~/alwaysai/models/alwaysai/yolo_v3 directory.
Set and update environment variables
The Device Agent enables you to set and update environment variables for all services or a single service of you application.
$ aai-agent app set-env <key=val> --project <project_id> [--service <service>]
For example, to set the following environment variable for the alwaysai
service run the following command on the device:
$ aai-agent app set-env TEST_ENV=1 --project <project_id> --service alwaysai