Data Annotation
After you have uploaded your images into Dataset Management, the next step is to annotate your data. The type of data annotation required depends on the type of model you are training, for more information see our Introduction to Model Training article. Currently, alwaysAI’s training tool trains an object detection model, so the method of annotation is to draw bounding boxes around all examples of the target label(s) in your dataset. Use the intuitive annotation functionality built into Dataset Management to easily create your bounding boxes.
Annotation Tool
Accessing the Tool
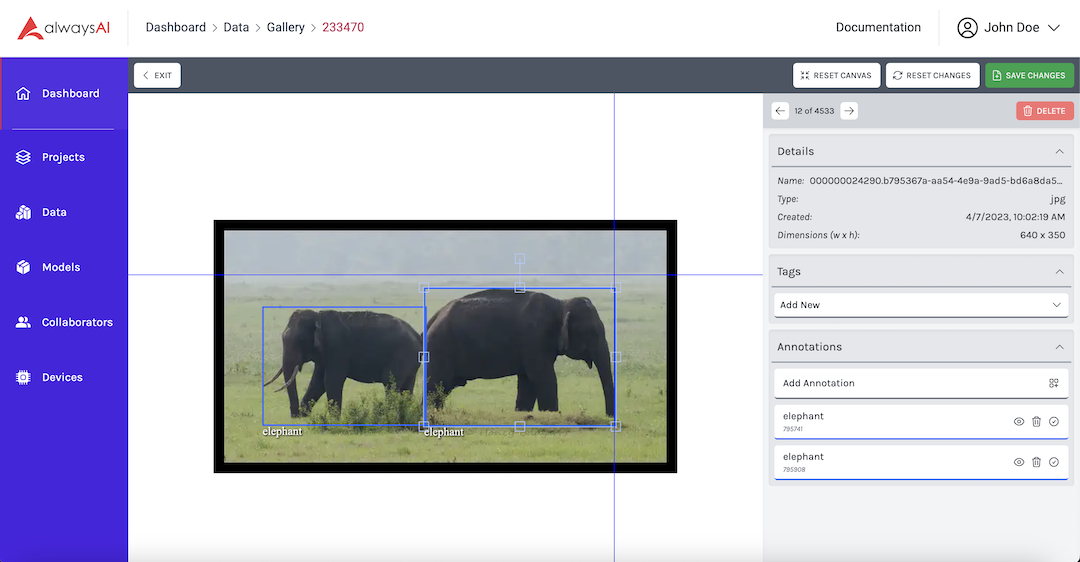
Click on any image from your gallery screen or the asset tab of the collection screen to open the image details screen. This is where you will annotate your images. You’ll see a full size view of the image along with metadata about the image, tags associated with the image, and any existing annotations.
Annotation mode
To enter Annotation Mode click the Add Annotation button (See below). Clicking the button reveals the Annotation Dropdown, from which you can either select an existing class label from the dropdown component, or start typing in the text input component and create a new class label.

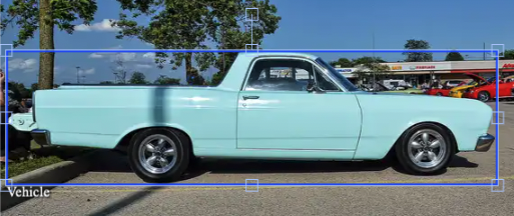
Once you have specified the class label of your current target object, draw the bounding box around the object by mousing down at one of the corners and holding the mouse button while dragging your mouse to the diagonally opposite corner. The guidelines that extend from your mouse curser will help you identify when you are positioned at the outer edges of the object. Once you have reached the opposite edges of the object, release the mouse button to create an annotation. There is a shaded area that appears as you draw your annotation that will help you draw an accurate bounding box. The annotation will be saved automatically when you navigate to the next image, or press the Save Changes button to save immediately.
Once you are in Annotation Mode every click and drag that you make within the boundaries of the image will result in a new annotation. Each new annotation you create will have the same class label unless you select or create a new class label. Press the trash can icon on the Add Annotation button to exit Annotation Mode.
Editing Annotations
Changing Size and Position
Every annotation that is visible on the image can be edited. To change the size or position of the annotation, first make sure you are not in Annotation Mode. Then, click anywhere on an annotation to reveal square anchor points (see below). Once the annotation has been selected, change the position of the annotation by clicking and dragging from within the area of the annotation. Click a specific anchor point to change the size of the annotation. An anchor point on the side of the bounding box will allow you to drag that side, and the anchor points on the corners allow you to re-position two sides at once. When you are satisfied with the changes you have made to the annotation, click outside the borders to de-select it. Similar to creating a new annotation, you can save it manually by pressing Save Changes or use the auto save feature by navigating away from this image within the Dataset Management tool.
Changing Class Label
In order to change the label of an existing annotation, you must first select the annotation. This can be be done in two different ways. The first is explained above, click on the annotation. The other way is to click the check mark that can be found on the edge of the annotation label (See below). Once selected, change the class label using the class component. Select an existing class label by using the dropdown functionality. Create a new class label by manually typing it into the text input area and selecting the option to create a new label from below the text input.
Change Annotation Visibility
Sometimes the number of annotations on an image can increase to a point where you want to remove one or more in order to better place new annotations. Control the visibility of an individual annotation by toggling the eye icon on the annotation label.
Delete an Annotation
If you no longer want an annotation that has been saved to an image, press the trash can icon on the annotation label. The annotation will be removed from the image, and the annotation label will be greyed out. This can be reversed by toggling the trash can icon before navigating away from the image. If the deletion is not reversed, the annotation will be deleted for good once changes have been saved.
Annotation Tips and Tricks
Keyboard Shortcuts
Save time during an annotation session by using keyboard shortcuts.
F: Next Image - Skip to the next image in the annotation queue. Changes will be automatically saved
D: Previous Image - Navigate to the previous image in the annotation queue. Changes will be automatically saved.
CRTL/Command + S: Save Changes - This is a standard shortcut we support
Annotation Colors
When a new class label is created, it will be rendered grey by default. After an annotation that uses that class label is saved, that annotation, as well as any additional annotations labeled with the same class will all be rendered in the same color. This allows you to quickly get a high level overview of the annotations associated with a single image. This color is used where ever ever you see that annotation - e.g. Collection summary, Class filter list