Collections
A collection is a way to organize images and prepare them for training your computer vision model. You can annotate your images as well as review and edit existing annotations. Mix and match images and classes from your gallery to create new and robust collections. When your collection is ready to go, publish it as a dataset for immediate use in the Model Training Toolkit
Create a New Collection
The most common way to create a new collection is to select a number of images, and from the Selection tab on the sidebar, start typing a collection name in the Create New Collection text area. When you are ready to create the collection, press the purple button to save. You will be automatically taken to the detail view of your newly created collection.
Another of creating a new collection is to import a dataset from your dataset list. Choose Unpack to Gallery from the action menu on the dataset list item and your dataset will be unpacked to a newly created collection.
Viewing Collections

The Collections dashboard displays a list of your current collections. Each collection card has summary information about the collection: name, number of image, and when it was last updated. The filter components on the sidebar only show values that occur in images that are in collections, not from your entire gallery of images.
Collection Details
Clicking on any individual collection will take you to the detail view of that collection. The detail view has tabs that give you a Summary of collection information, a Distribution of classes within the collection, and access to the collection Assets. You can change details and perform other actions using the action buttons on the top bar.
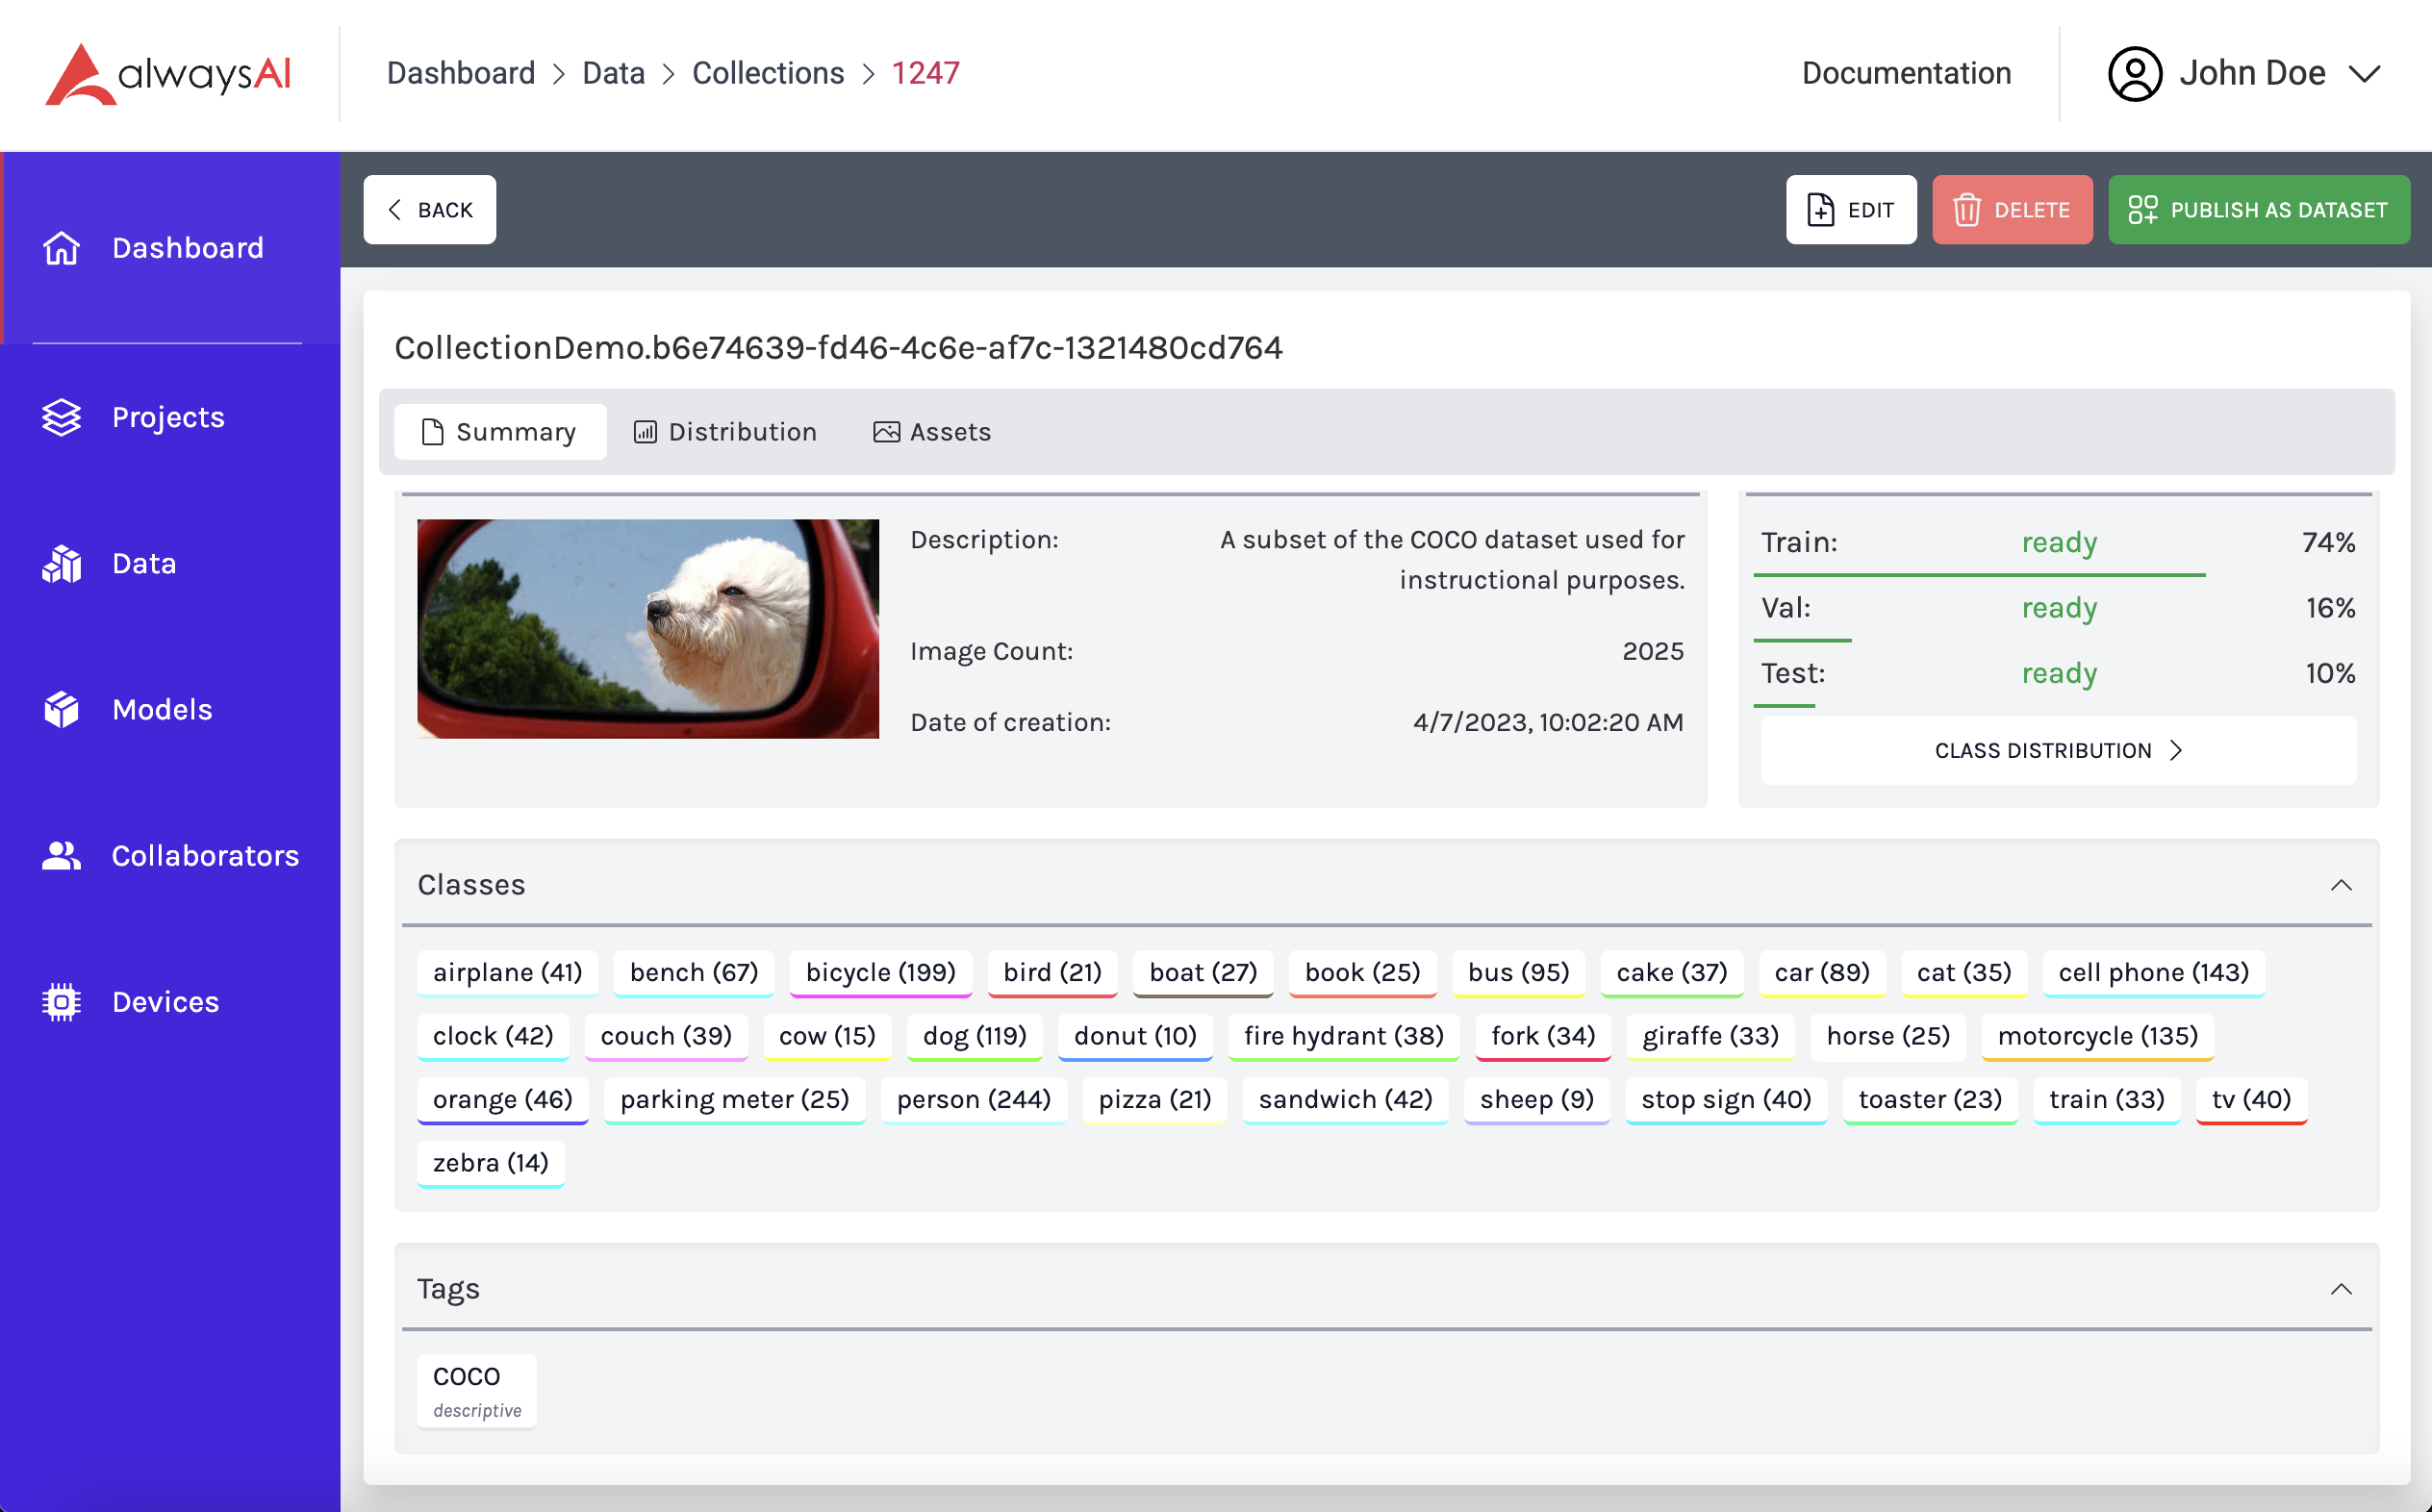
Summary
The Summary page gives you an overview of the collection. It includes a description of the dataset as well as a count of the images and the date the collection was created.
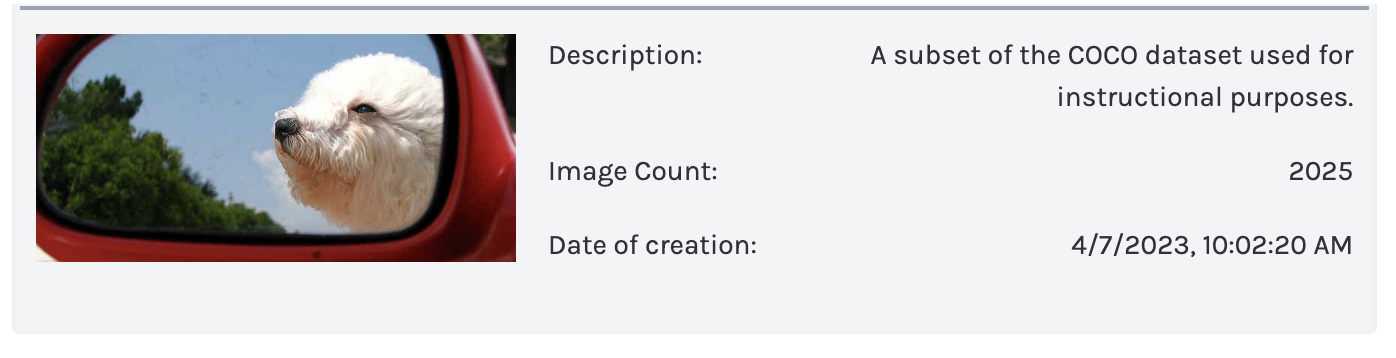
The section titled Split provides the current breakdown of images into three categories: Train, Val (validation), and Test. These percentages describe how the dataset will be partitioned when it is published for training. The train images will be processed and used for model training, while the validation images will be used to validate the model while training. Test images will be kept out of the model training process and used to evaluate the model manually. The status of each of these categories refers to whether there is at least one example of each class represented in each category. If one category does not contain an example of one class, the status will read Missing Class and you will not be able to publish the collection as dataset, as it will be hard to properly train and evaluate a model without proper class distribution. More on distribution can be seen below.
The Classes section displays all the classes that are currently found in the dataset, along with the count of each one. Note that each one has a color on the label, which is the same color used to render the bounding box.

All tags associated with this collection are displayed in the Tags section. You can edit these tags by using the white Edit button from the top bar.
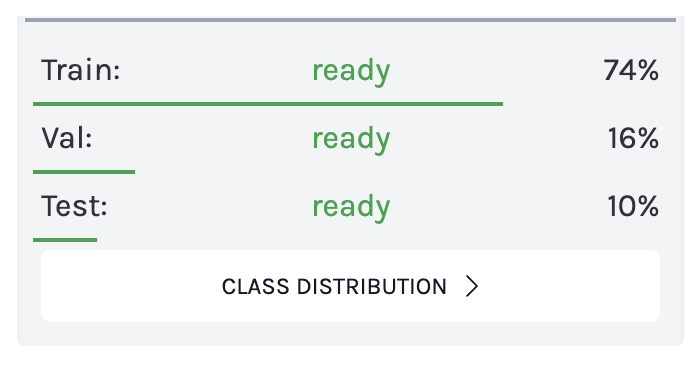
Distribution
Click on the Distribution button on the grey navigation bar to see a detailed breakdown of how the classes are distributed in the collection. The distribution is broken into three categories: train, validation (val), and test. Since the images are put into these categories randomly, the distribution should maintain a similar ratio across each category, even though the number of images will vary. The goal is to have as even a distribution as possible so as to not introduce bias into your computer vision model.
Below the distribution graph, you will see sliders representing the split percentages we talked about above. These can be changed here on this screen by pressing the white Edit button from the top menu. A simple rule of thumb is the larger your dataset is, the smaller a percentage is needed to be withheld from training.
Assets
The Assets page is a gallery style view of the images in the collection. You can perform the same actions that you can in the gallery view, including clicking an image to get the image details and annotate it. You can filter the collection images by class, and see only images that don’t have annotations. Consider this a miniature gallery with all the same functionality.
Actions
The actions that you see on the top menu are pretty straightforward:
Back Takes you back to the Collections Dashboard
Edit turns on edit mode and allows you to edit things like Description and Tags
Delete Deletes the current collection
Publish as Dataset Publishes the dataset to your personal dataset library which allows you to train the collection as a dataset. If you do not have at least one example of every class in each category of split, you can not publish your dataset. More about publishing your dataset here